How to Update Motherboard BIOS Without a CPU (USB BIOS Flashback Guide)
Advertisement
One of the most frustrating moments in PC building is finishing an upgrade only to encounter a black screen, spinning fans, and a silent system that refuses to POST. This scenario is remarkably common when buying used hardware in the UK—for example, pairing a Ryzen 7 5700X3D with a B450 motherboard manufactured in 2020, or dropping a 14th Gen Intel Core i5 into an older B660 board.
Historically, solving this required tracking down an older compatible CPU just to boot into the UEFI and flash the firmware. Fortunately, modern motherboards incorporate an invaluable hardware failsafe: USB BIOS Flashback. This feature allows an onboard microcontroller to reprogram the SPI flash memory chip directly, requiring nothing more than a power supply and a properly formatted USB drive—no CPU, no RAM, and no GPU needed.
Does Your Motherboard Have BIOS Flashback?
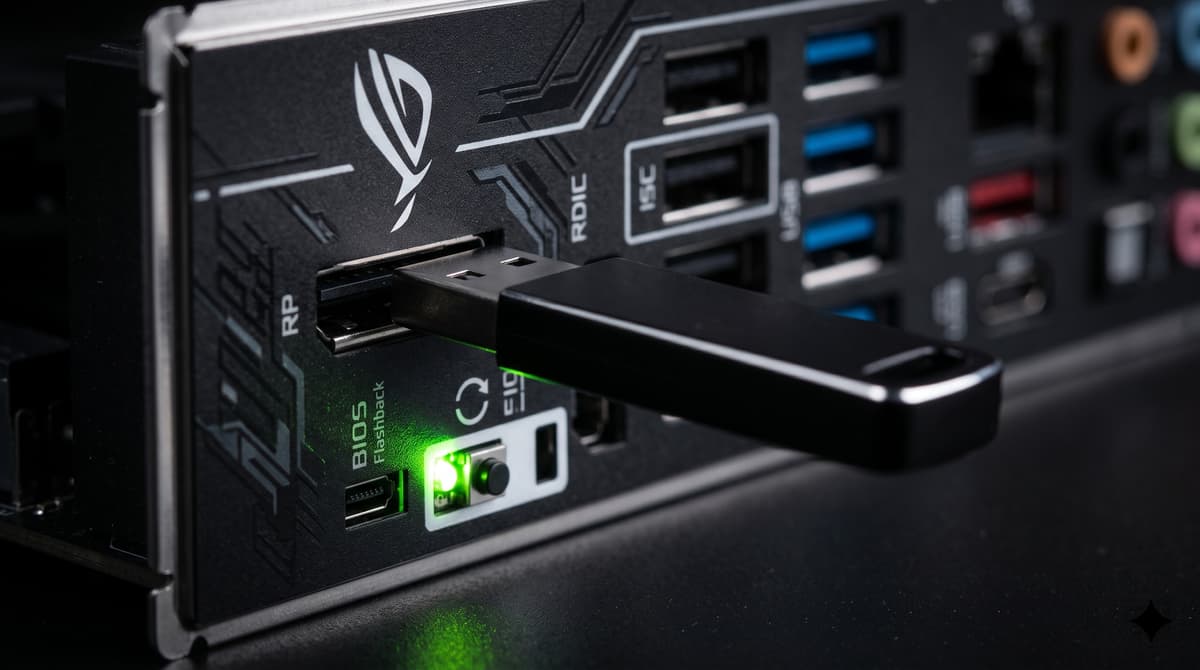
Inspect the rear I/O shield on the back of your PC or motherboard box. You are looking for a small tactile push-button (often with a circular arrow icon or labeled “BIOS” / “Flashback”) adjacent to a specifically outlined USB port:
Nearly all MSI B450/B550/B650 MAX boards, ASUS TUF/ROG boards, Gigabyte AORUS boards with Q-Flash Plus, and modern ASRock Steel Legend/Taichi series.
Entry-level budget boards (ASUS Prime -K series, Gigabyte DS3H non-Plus revisions, basic A320/H610 boards). If your board lacks this button, you will need a loaner CPU to update.
Manufacturer Renaming Cheat Sheet
The hardware flasher cannot browse folders or recognize complex version strings. You must rename the extracted BIOS binary file precisely:
| Manufacturer | Marketing Name | Required File Name | Designated USB Port |
|---|---|---|---|
| ASUS | USB BIOS FlashBack | Varies by model (Use BIOSRenamer.exe provided in zip) | Labeled 'BIOS' with white box border |
| MSI | Flash BIOS Button | MSI.ROM | Directly next to physical push-button |
| Gigabyte / AORUS | Q-Flash Plus | GIGABYTE.BIN | White plastic USB port labeled 'BIOS' |
| ASRock | BIOS Flashback | CREATIVE.ROM (or pspbios.bin on older) | Boxed port labeled 'BIOS Flashback' |
The 5-Step Flashback Execution Protocol
Step 1: Prepare the USB Flash Drive
Use an older, smaller USB 2.0 flash drive (8GB, 16GB, or 32GB) if available. High-capacity USB 3.2 drives formatted in exFAT or NTFS will fail. Insert into a working PC, open Command Prompt or Disk Management, and format as FAT32 with MBR.
Step 2: Download and Rename the Firmware
Visit the official support page for your motherboard model. Download the latest stable BIOS (avoid beta versions ending in letter sub-suffixes unless required for specific new CPU support). Extract the zip archive and rename the file according to the table above (e.g. rename E7C02AMS.3I0 to MSI.ROM). Copy it to the root directory of the USB drive.
Step 3: Connect Power Supply Cables
Connect the 24-pin ATX motherboard power cable and the 8-pin EPS 12V CPU power cable from your power supply to the motherboard. You do NOT need to install the CPU, cooler, RAM sticks, or graphics card. Flip the PSU rocker switch to ON.
Step 4: Insert Drive and Press the Flashback Button
Plug the USB drive into the designated Flashback USB port. Press and hold the physical BIOS Flashback button for 3 full seconds until an LED indicator light begins to blink slowly. Release the button.
Step 5: Wait for Completion (5 to 8 Minutes)
The LED will blink faster as the EEPROM chip is erased and rewritten. DO NOT turn off the power supply or pull out the USB drive. When the process completes (usually 4 to 8 minutes), the LED will extinguish completely. The board is now fully updated and ready for your new CPU!
Troubleshooting: What if the Light Flashes 3 Times and Stops?
Common culprits include: hidden file extensions (e.g. accidentally naming it MSI.ROM.rom due to Windows hiding extensions for known file types), formatting the drive with a GPT partition table instead of MBR, or using a USB 3.0 drive that the primitive embedded controller cannot negotiate. Try a different USB 2.0 thumbdrive.
Need advice on testing your freshly flashed board? Read How to Test a Used Motherboard and CPU in the UK.
Frequently Asked Questions
Can I update with the CPU and RAM already installed in the socket?
Yes! USB BIOS Flashback works identically whether the motherboard is completely bare on a cardboard box or fully assembled inside a case with CPU, cooler, RAM, and GPU installed.
What happens if power is cut during a BIOS Flashback?
Unlike standard software BIOS flashing where a power outage bricks the board, hardware BIOS Flashback operates outside the primary BIOS code. If interrupted, simply restore power and restart the USB Flashback procedure from step 1.
Does a BIOS update wipe my Windows license or personal files?
No. Flashing the motherboard firmware updates the SPI EEPROM chip on the motherboard. Your SSD, files, operating system, and data are completely untouched. However, it will reset all BIOS settings (XMP/EXPO, fan curves) to factory defaults.
Buy Tested Motherboards on Koukan
Every motherboard sold on Koukan is protected by escrow payment security. Test sockets, verify USB ports, and flash BIOS versions safely before completing payment.
Advertisement